Showing posts with label Recipes. Show all posts

Wednesday, June 18, 2014

Pancakes.

Most of the time I prefer my pancakes thin, crispy, and topped with white sugar, sometimes homemade strawberry jam.  I roll up my pancake and eat it in two to three bites. Some of the time, however, I do eat my pancakes with syrup.  It has to be pure maple syrup.  And that is when my pancakes have chocolate chips in them.  And I only like my pancakes to have chocolate chips if they are fluffy.

Last week the craving was for thin, small pancakes with granulated sugar.  Tonight, these fluffy, rich babies.  (Try the recipe if you know what's good for you.)

The husband is at a work meeting till late. So it is just me, the dog, that stack, and the World Cup tonight. Boom, baby.

Saturday, April 5, 2014

{Recipe Share} Bacon-Wrapped Basil Pesto Chicken


I know.  I'm posting another recipe.  I have more to come, too.  Whatever.


Bacon-Wrapped Basil Pesto Chicken

Ingredients
6 boneless, skinless chicken breasts, pounded flat (you can halve the breasts if you'd like)
about 6 Tbsp. basil pesto
garlic salt and pepper
Feta, Parmesan, or Swiss cheese
6 slices bacon or prosciutto
2-3 Tbsp. olive oil

Preheat oven to 400 degrees F.

Sprinkle flattened chicken breasts with garlic salt and black pepper. Drop a tablespoon of basil pesto in each breast, add some cheese, and roll up.  Wrap bacon around each chicken breast and secure with toothpicks.

Place chicken in a 9x9-inch baking dish and drizzle with olive oil.

Bake 30-35 minutes (or until chicken has an internal temp. of 160 degrees F).


The chicken is super tender and makes great leftovers. (Preserve the juices when storing to help with reheating.)


*Note: This recipe is a mash-up of a few from allrecipes.com.  Just search the ingredients or name and you'll find the original.

Monday, March 10, 2014

{Recipe Share} Deep Dish Chocolate Chip Cookie

When I'm really happy and excited about life, I like to express it in my cooking.  I love to make delicious dishes.  When I'm sad and stressed, I like to express it in my cooking.  I need to make delicious dishes.

And so, really, all the time I just love food.  Especially dessert.

I'd eaten the entire loaf of pull-apart cinnamon bread the day before and wanted something to top off our Sunday dinner, so I decided to try this Deep Dish Chocolate Chip Cookie recipe.  Yes, I got it on Pinterest, and yes, I approve.  It really is as easy as she claims.  (Although how she and her family manage to eat this once a week is beyond even me.  Someone call a nutritionist asap...)


{This} is the recipe.  I would maybe even recommend going a little lighter on the amount of chocolate.  But maybe that's because I ate this the day after an entire loaf of pull-apart cinnamon bread.  Anywho, enjoy.

*NOTE: I don't have an iron skillet (though I would love one in orange, everybody...) but this recipe worked just fine in my glass dish.  I melted the butter and sugars on the stove in a nonstick pan first and then transferred it to this dish to finish making the recipe without a problem

Monday, February 10, 2014

{Recipe Share} Easy Homemade Soft Pretzels

Here it is: that amazing soft pretzel recipe I promised some of you.  This batch was extra special because my husband actually formed most of the pretzels.


Soft Pretzels

4 teaspoons yeast + 1 teaspoon sugar + 1 1/4 cup warm water
3 1/2 cups flour plus an additional 1/2 cup
2 Tablespoons butter, melted
1/3 cup sugar
1 1/2 teaspoons kosher salt (plus more for garnish)
heaping 1/4 cup baking soda
2 cups water
melted butter for topping

In a small bowl or liquid measuring cup, dissolve water, sugar and yeast. Let sit for 10 minutes (until frothy). Meanwhile, mix together sugar, salt, and 3 1/2 cups flour in a large bowl. Using finger or spoon, create a small well in the center of the mixture. Pour melted butter followed by yeast mixture into the well. With a wooden spoon, mix until combined. Using either a stand mixer with dough hook or your hands, knead dough, slowly adding additional 1/2 cup flour.  Knead for 4-6 minutes if using mixer, 7-10 minutes if using hands.

Turn oven to 400 degrees F for 1 minute and then turn off.  Lightly oil large bowl and transfer dough.  Cover with a dampened lightweight towel and place inside warmed oven.  Let rise for 1 hour or until doubled in size.

Remove dough from oven and set heat to 425.  In another bowl, microwave baking soda and water for 3 minutes.  Stir until baking soda dissolves.  Oil or lightly flour your surface and turn out the dough.  Divide into 12 equal sections.

Roll each piece into a rope (the "jump rope" method--holding each end and swinging dough--works well).  Twist each piece into a pretzel.  Gently dip pretzels into the hot water/baking soda mixture and transfer to a cookie sheet lined with parchment paper (6 pretzels per tray).  Sprinkle with kosher salt and bake on middle rack for 8-10 minutes or until browned.  Remove and brush with melted butter.

Once cooled, store in an airtight container or freeze for future use.

***

These are so tasty.  We may or may not have devoured all twelve in one night...

Enjoy!  Tell me what you think!


*NOTE: This recipe from Pink Pistachio.
Joanne Ozug at Fifteen Spatulas has a great recipe for these as well.  The dough only needs to raise for 30 minutes rather than an hour.  That one requires instant rise yeast.  If you try both recipes, let me know which one is your favorite!

Monday, January 27, 2014

{Recipe Share} That Fling...er...Sandwich I Told You About

For those of you who follow my Instagram you already got a sneak peak at the mouth watering sandwich I'm about to present.  Holy heaven it is good.  This is the kind of sandwich that actually has a recipe--in other words, a little prep time and cooking is involved before the actual "sandwiching" part.  I know, I know.  Some of you are thinking that this so called sandwich has now crossed the line.  It defies what as children we thought a sandwich should be--fast and easy with little prep and little clean up.  But let's face it, we've grown up.  Our sandwiches can now go beyond unscrewing a lid and wielding a butter knife.

And let me tell you, many a sandwich will ever only dream of being this good.  With just a little effort this baby makes the cut of amazing, high class sandwiches.  It's good enough to eat for dinner.

For the record, as a kid, by principle, I did not like sandwiches. "Don't mix my food" was my motto.  It wasn't until I worked at a restaurant that served beautiful sandwiches that I realized the potential of the various mixings between two slices of bread.  Especially when ciabatta and a griddle was involved.  I was introduced to some flavor combinations that just can't fail.  Spinach, artichoke, and cheese (preferably asiago) is one of those combinations.  When I stumbled on this sandwich I knew I had to try it.

I have now eaten this thing twice in less than 24 hours.


Notice the adorable dog?  He didn't get any...

I know, I know.  Enough talk.  Your mouth is drooling and I'm keeping you from your sandwich.  Here is the recipe.  Now go indulge.

Spinach Artichoke Grilled Cheese

Makes 2 sandwiches
2 cloves garlic
1 tablespoon olive oil
Kosher salt
Fresh spinach – enough for about 3 cups chopped
Canned artichoke hearts – about 3 (around 6 ounces)
2 tablespoons sour cream


1 cup shredded cheese (I used a mozzarella and swiss blend, but I wish I'd had asiago on hand; monterray jack would also be good)

4 pieces bread

Butter or olive oil for your bread


Dice the 2 cloves garlic. Chop the artichokes. Wash and stem the spinach, then chop it coarsely.  (I used my food processor but I suggest not letting your spinach leaves get too fine, as the recipe suggests.)
Heat about 1 tablespoon olive oil in a skillet. Add the garlic and saute for 30 seconds. Then add the spinach and a pinch of kosher salt, and saute for a few minutes until just limp. Add the artichokes and saute for another minute or so, until heated through. Drain off any liquid from the pan. Stir in 2 tablespoons sour cream and another pinch of kosher salt.
Spread butter (or olive oil) on one side of each of the 4 bread pieces. Heat a panini griddle/griddle pan to medium high heat. Place 2 pieces of bread on the griddle, buttered side down. On each piece, spread some shredded cheese, the spinach artichoke filling, some more cheese (1/2 cup cheese per sandwich), and the other piece of bread.  Cook until the cheese is melted, flipping the sandwich if necessary..

(Follow this link to view the recipe source)


Bon Appetit!

Tuesday, November 19, 2013

{Recipe Share} Rocky Road Cookies

Since the husband and I do whatever we can to help us look forward to Mondays, I try to prepare a treat to munch on during our evening weekly planning and spiritual thought.

I got {this} Rocky Road cookie recipe from Fifteen Spatulas and have been really excited to try it.

photo credit Joann Ozug at Fifteen Spatulas

Oh my heavens.  These Rocky Road cookies are so delicious.  The toasted almonds give it an incredible flavor.  I sliced my own almonds in my food processor, which gave me a nice almond powder as well, which I included in my dough.  The almond powder lent the cookie a wonderful texture.

I did have a little trouble with the cookies sticking to the parchment paper, but I think a little more cook time or a little more almond/fewer chocolate chips would have helped with that.  Also, to store the cookie, you need to wrap each one in wax or parchment paper before putting them in tupperware or a bag because they are so gooey.

But this recipe is easy and SO mouth watering.  (Warning: It's rich I tell ya.  Like, you might get feverish if you eat more than one cookie.)

Let me know if you try it!

Happy indulging,

Kelsi

Monday, October 28, 2013

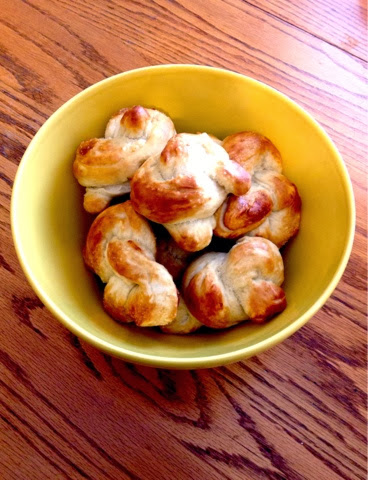
{Recipe Share} "Cheddar Bay" Buiscuits

I had planned on sharing a special recipe with you: my dad's bread recipe.  I had planned on taking pictures of the steps, showing you his secret ingredient, and imagining your excitement to try it yourself.

I did get started in my plan:


^^The secret ingredient


But then I FAILED.

My bread didn't turn out.  (Yeast is as temperamental as a teenager. : / )


Totally flat, ugly bread.  It tastes great, but in no way does bread like that give me the right to share the recipe with you.

So instead I'm sharing something much easier and quicker.  You might have seen the recipe on Pinterest already.  Well, I tried it and we loved the result.

"Cheddar Bay Biscuits"--Red Lobster style.


Recipe found {here}.

So laugh with me at homemade bread gone wrong while we all stuff our faces with cheese-garlic-butter delight.

~K

PS-  I didn't have any garlic powder, only garlic salt or fresh cloves, so I went with the salt, increasing the amount a bit, and the biscuits still turned out great.